Home
>
Addonics Technologies
>
Multi-Bay Enclosure
>
Addonics Technologies Storage Rack Rackmount Chassis srda User Manual
Addonics Technologies Storage Rack Rackmount Chassis srda User Manual
Here you can view all the pages of manual Addonics Technologies Storage Rack Rackmount Chassis srda User Manual. The Addonics Technologies manuals for Multi-Bay Enclosure are available online for free. You can easily download all the documents as PDF.
Page 1
Technical Support
If you need any assistance to get your unit functioning properly, please have your
product information ready and contact Addonics Technical Support at:
Hours: 8:30 am - 6:00 pm PST
Phone: 408-453-6212
Email: http://www.addonics.com/support/query/
v5.1.11
T E C H N O L O G I E S
www.addonics.com
www.addonics.com
Phone:   408-573-8580
Fax:     408-573-8588
Email:   http://www.addonics.com/sales/query/
CONTACT US
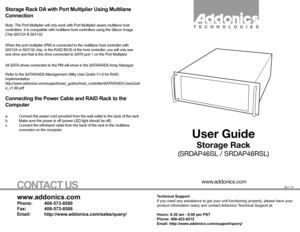
User Guide
Storage Rack
(SRDAP46SL / SRDAP46RSL)
Storage Rack DA with Port...
Page 2
110
www.addonics.comTechnical Support (M-F 8:30am - 6:00pm PST)    Phone: 408-453-6212  Email: www.addonics.com/support/query/
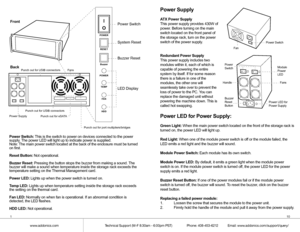
Power Supply
ATX Power Supply
This power supply provides 430W of
power. Before turning on the main
switch located on the front panel of
the storage rack, turn on the power
switch of the power supply.
Redundant Power Supply
This power supply includes two
modules within it, each of which is
capable of powering the entire
system by itself. If for some reason
there is a...
Page 3
92
www.addonics.comTechnical Support (M-F 8:30am - 6:00pm PST)    Phone: 408-453-6212  Email: www.addonics.com/support/query/
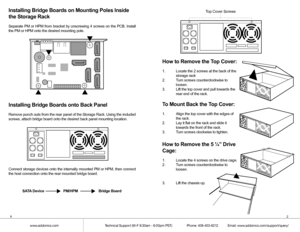
Installing Bridge Boards on Mounting Poles Inside
the Storage Rack
Separate PM or HPM from bracket by unscrewing 4 screws on the PCB. Insta\
ll
the PM or HPM onto the desired mounting pole.
Installing Bridge Boards onto Back Panel
Remove punch outs from the rear panel of the Storage Rack. Using the inc\
luded
screws, attach bridge board onto the desired back panel mounting...
Page 4
38
www.addonics.comTechnical Support (M-F 8:30am - 6:00pm PST)    Phone: 408-453-6212  Email: www.addonics.com/support/query/
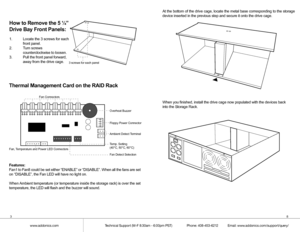
At the bottom of the drive cage, locate the metal base corresponding to \
the storage
device inserted in the previous step and secure it onto the drive cage.

When you finished, install the drive cage now populated with the devices\
 back
into the Storage Rack.

How to Remove the 5 ¼”
Drive Bay Front Panels:
1.  Locate the 3 screws for each
  front panel.
2.  Turn screws...
Page 5
74
www.addonics.comTechnical Support (M-F 8:30am - 6:00pm PST)    Phone: 408-453-6212  Email: www.addonics.com/support/query/
C. 3.5” Mobile Rack
1.  Separate the ventilation front panel
and the metal base by removing the two
flat-head screws.
2.  Attach the 3.5” drive cradle onto
the 3.5” to 5.25” drive bay mounting
bracket at the six aligned screw hole
locations.

3.  Attach the metal base onto the
optical drive or other 5.25” storage device
using the flat head screws from the
ventilation...
Page 6
56
www.addonics.comTechnical Support (M-F 8:30am - 6:00pm PST)    Phone: 408-453-6212  Email: www.addonics.com/support/query/
d.  Slide the disk array
  into the storage rack.

e.  Secure the Disk array
  by screwing the top
  and bottom brackets
  to the frame of the
  storage rack.
I
OI
OR
Screws Screws
Installing Storage Devices on the Storage Rack
A. 3.5” hard drive
1.  Attach the 3.5” to 5.25”
mounting brackets onto both
sides of the 3.5” SATA or IDE hard
drive using the included...


