Sony Digital 8 Manual
Here you can view all the pages of manual Sony Digital 8 Manual. The Sony manuals for Camera are available online for free. You can easily download all the documents as PDF.
Page 1
2-515-259-12(1)
© 2005 Sony Corporation
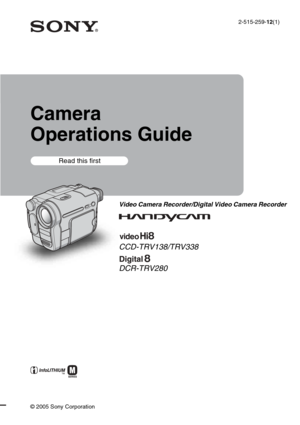
Camera
Operations Guide
Video Camera Recorder/Digital Video Camera Recorder
CCD-TRV138/TRV338
DCR-TRV280
Read this first
Page 2
2
Read this first
Before operating the unit, please read this
manual thoroughly, and retain it for future
reference.
WARNING
To prevent fire or shock hazard, do not
expose the unit to rain or moisture.
This symbol is intended to alert the
user to the presence of uninsulated
“dangerous voltage” within the
product’s enclosure that may be of
sufficient magnitude to constitute a
risk of electric shock to persons.
This symbol is intended to alert the
user to the presence of important
operating and...
Page 3
3
CAUTION
You are cautioned that any changes or modifications
not expressly approved in this manual could void your
authority to operate this equipment.
bNotes:
 This equipment has been tested and found to comply  with the limits for a Class B digital device, pursuant
to Part 15 of the FCC Rules.
These limits are designed to provide reasonable
protection against harmful interference in a
residential installation. This equipment generates,
uses, and can radiate radio frequency energy and, if
not...
Page 4
4
 The illustrations used on this manual are based on the model DCR-TRV280.
 The screens shown in this manual are from a  Windows XP computer. The screens may vary
depending on the OS.
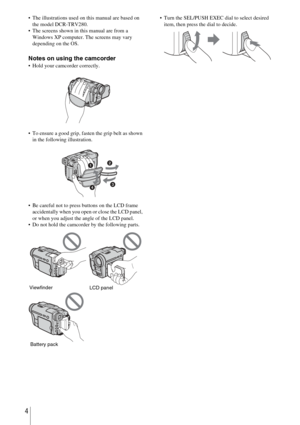
Notes on using the camcorder Hold your camcorder correctly.
 To ensure a good grip, fasten the grip belt as shown in the following illustration.
 Be careful not to press buttons on the LCD frame  accidentally when you open or close the LCD panel,
or when you adjust the angle of the LCD panel.
 Do not hold the...
Page 5
5
Read this first .............................................................................................  2
Quick Start Guide
Recording movies ......................................................................................  8
Recording/Playing back with ease ...........................................................  10
Getting started
Step 1: Checking supplied items ..............................................................  11
Step 2: Charging the battery...
Page 6
6
Superimposing a title................................................................................  31
Searching for the last scene of the most recent recording – END SEARCH .................................................................................  33
Playback
Viewing pictures recorded on a tape ........................................................  34
Playing back in various modes  .................................................................................. 35
Playing back with...
Page 7
7
Advanced operations
Customizing Your
Camcorder
Changing the menu settings  .............. 41
Using the   (MANUAL SET) menu – PROGRAM AE/P EFFECT,
etc. ............................................... 42
Using the   (CAMERA SET) menu  – 16:9 WIDE/STEADYSHOT,
etc. ............................................... 45
Using the   (PLAYER SET)/  (VCR  SET) menu
 – HiFi SOUND/EDIT,
etc. ............................................... 49
Using the   (LCD SET) menu

– LCD B.L./LCD COLOR, etc.  ...... 51...
Page 8
Quick Start Guide8
Quick Start Guide
Recording movies
1Attach the charged battery pack to the camcorder.
To charge the battery, see page 12.
2Insert a cassette into the camcorder.
aLift up the viewfinder.bSlide the battery pack in the direction
of the arrow until it clicks.
aSlide the  OPEN/
EJECT lever in the
direction of the arrow
and open the lid until
it clicks.
The cassette compartment
comes out automatically.
bInsert the cassette with
its window-side facing
up, then push the center
of the...
Page 9
Quick Start Guide
Quick Start Guide
9
3Start recording while checking the subject on the LCD screen.
The date and time is not set up in the default setting. To set the date and time, see page 17.
4View the recorded picture on the LCD screen.
aRemove the lens cap.
Lens cap is not attached
when you purchase your
camcorder (p. 104).
bPress OPEN and
open the LCD panel.
cWhile pressing the
green button, slide
the POWER switch
down to light up the
CAMERA lamp.
The power turns on.
dPress REC START/...
Page 10
Quick Start Guide10
Recording/Playing back with ease
By switching to Easy Handycam operation, recording/playback operation
becomes even easier.
Easy Handycam operation allows easy recording/playback for even first
time users by providing only the basic functions for recording/playback.
For details, see instructions for each operation.
See page 26 for recording, page 36 for playback.
Press EASY when recording/
playing back.
EASY lights up in blue (1) and
screen font size increases ( 2) during
Easy...


