Sony DPP FP35 User Manual
Here you can view all the pages of manual Sony DPP FP35 User Manual. The Sony manuals for Printer are available online for free. You can easily download all the documents as PDF.
Page 1
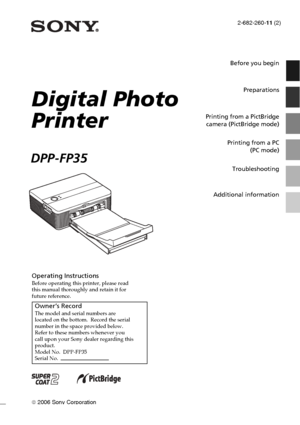
2-682-260-11 (2) 2006 Sony Corporation Operating InstructionsBefore operating this printer, please read this manual thoroughly and retain it for future reference. Owner’s RecordThe model and serial numbers are located on the bottom. Record the serial number in the space provided below. Refer to these numbers whenever you call upon your Sony dealer regarding this product. Model No. DPP-FP35 Serial No. Digital Photo Printer DPP-FP35 Before you begin Preparations Printing from a PictBridge camera...
Page 2
2 GB
WARNING
To reduce fire or shock hazard, do not
expose the unit to rain or moisture.
For the customers in the U.S.A.
CAUTION
You are cautioned that any changes or modifications
not expressly approved in this manual could void
your authority to operate this equipment.
If you have any questions about this product, you
may call:
Sony Customer Information Services Center
1-800-222-SONY (7669)
The number below is for the FCC related matters
only.
Regulatory Information
  Declaration of ConformityTrade...
Page 3
3 GB
NOTICE FOR CUSTOMERS IN THE
UNITED KINGDOM
A moulded plug complying with BS 1363 is fitted to this
equipment for your safety and convenience.
Should the fuse in the plug supplied need to be replaced,
a fuse of the same rating as the supplied one and
approved by ASTA or BSI to BS 1362, (i.e.marked with
 or  mark) must be used.
If the plug supplied with this equipment has a detachable
fuse cover, be sure to attach the fuse cover after you
change the fuse. Never use the plug without the fuse
cover. If...
Page 4
4 GB
Table of contents
Before you begin
Overview ................................................ 6
What you can do with this printer .............. 6
Identifying the parts ............................... 8
Preparations
1Checking the contents of the
package .......................................... 10
2Preparing the print pack ................. 11
Size of print paper ................................... 11
Optional print packs ................................ 11
3Loading the print cartridge ................
Page 5
5 GB
Printing from a PC (PC mode)
Installing the software .......................... 19
System requirements ............................... 19
Installing the printer driver ...................... 20
Installing the Picture Motion Browser ...... 23
Printing photos from the Picture
Motion Browser .............................. 25
Printing from other application software .. 32
Troubleshooting
If trouble occurs .................................... 34
If paper jams ........................................ 42...
Page 6
6 GB
Before you begin
Printing from a PictBridge
camera
(PictBridge mode) c Page 17
Connect a PictBridge-compliant digital
camera to the printer to print images
using the camera.
Printing from a PC
(PC mode) c Page 19
Connect a PC to the printer to print
images using the PC.
Depending on the operation mode you choose, follow the operation flow below:
Get the printer ready for printing
• Prepare the print pack (not supplied) (page 11)
• Load the print cartridge (page 12)
• Insert the print paper (page...
Page 7
7 GB
Before you begin
PictBridge-compliant*
(page 17)
The printer supports the PictBridge
standard, so that you can print an image
easily from a PictBridge-compliant digital
camera.
Windows PC support with a convenient
USB connection (page 19)
By connecting the printer to your PC via a
USB connector and installing the supplied
printer driver, you can print images from
your PC.
Super Coat 2
The Super Coat 2 feature enables high
durability and moisture or fingerprint
resistance, keeping your prints in...
Page 8
8 GB
Identifying the parts
For details, see the pages indicated in the
parentheses.
Printer
1Paper tray compartment door
(page 15)
21 (on/standby) switch (page 17)
•To turn on the printer, press 1 to turn
on the 1 indicator in yellow green.
•To turn off the printer, keep pressing 1
for more than one second until the 1
indicator turns in red.
1 (on/standby) indicator (page 17)
•Lights in red:  The printer is in the
standby mode.
•Lights in yellow green: The printer is
powered on.
•Flashes in yellow green:...
Page 9
9 GB
Before you begin
8Ventilation holes
9DC IN 24V jack (page 16)
Insert the AC power adaptor supplied
here, and then connect the AC power
adaptor and the wall outlet with the
supplied AC power cord.
0 USB connector (page 21)Connects to the USB connector of your
PC.
qaPictBridge connector
(page 17)
Connect the PictBridge-compliant digital
camera.
Paper tray
1Paper eject tray (pages 13, 14)
2Paper tray lid (pages 13, 14)
Downloaded From ManualsPrinter.com Manuals
Page 10
10 GB
Preparations
1Checking the
contents of the
package
Make sure that the following accessories
are supplied with your printer.
Paper tray (1)
AC adaptor (AC-S2425) (1)
AC power cord * (1)
*The AC power cord illustrated is for 120V
only.  The plug shape and specifications of
the AC power cord differ depending on the
region you purchased the printer.
Cleaning cartridge (1)
CD-ROM (1)
–Sony DPP-FP35 Printer Driver
Software for Windows® XP
Professional/Windows® XP Home
Edition/Windows® 2000...


