Sony Fe1 Owners Manual
Here you can view all the pages of manual Sony Fe1 Owners Manual. The Sony manuals for Television are available online for free. You can easily download all the documents as PDF.
Page 1
1
SERVICE MANUAL                          FE-1  CHASSIS
MODEL                              COMMANDER     DEST            CHASSIS NO.MODEL                             COMMANDER     DEST            CHASSIS NO.
SELF-DIAGNOSTIC FUNCTION
RM-883
PROGR
MENU
/
®
KV-29X5ARM-883 Italian SCC-Q06A-A
KV-29X5BRM-883 French SCC-Q02A-A
KV-29X5DRM-883 AEP SCC-Q04A-A
KV-29X5ERM-883 Spanish SCC-Q05A-A
KV-29X5KRM-883 OIRT SCC-Q03A-A
KV-29X5LRM-883 Irish SCC-Q07A-A
KV-29X5RRM-883 OIRT SCC-Q03B-A
KV-29X5URM-883 UK SCC-Q01A-A...
Page 2
2
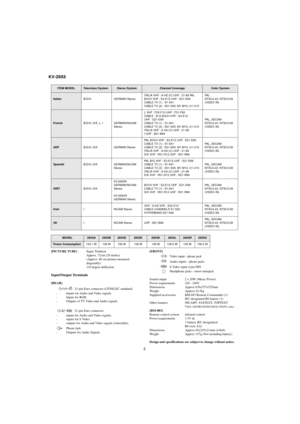
KV-29X5
ITEM MODELTelevision SystemStereo SystemChannel CoverageColor System
ItalianB/G/H GERMAN StereoITALIA VHF : A-H2 (C) UHF : 21-69 PAL
B/G/H VHF : E2-E12 UHF : E21-E69
CABLE TV (1) : S1-S41
CABLE TV (2) : S01-S05, M1-M10, U1-U10PA L
NTSC4.43, NTSC3.58
(VIDEO IN)
FrenchB/G/H, D/K, L, I GERMAN/NICAM
StereoL VHF : F02-F10 UHF : F21-F60
CABLE : B-Q B/G/H VHF : E2-E12
UHF : E21-E69
CABLE TV (1) : S1-S41
CABLE TV (2) : S01-S05, M1-M10, U1-U10
ITALIA VHF : A-H2 (C) UHF : 21-69
I UHF : B21-B69PAL, SECAM...
Page 3
3
KV-29X5
WARNING
  (KV-29X5L / KV-29X5U only)
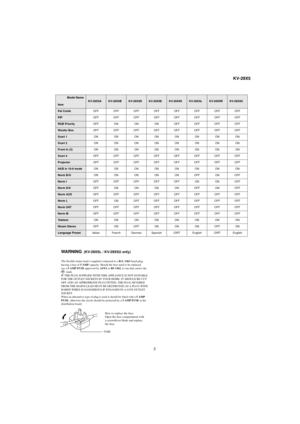
The flexible mains lead is supplied connected to a B.S. 1363 fused plug
having a fuse of 5 AMP capacity. Should the fuse need to be replaced,
use a 5 AMP FUSE approved by ASTA to BS 1362, ie one that carries the
the  mark.
IF THE PLUG SUPPLIED WITH THIS APPLIANCE IS NOT SUITABLE
FOR THE OUTLET SOCKETS IN YOUR HOME, IT SHOULD BE CUT
OFF AND AN APPROPRIATE PLUG FITTED. THE PLUG SEVERED
FROM THE MAINS LEAD MUST BE DESTROYED AS A PLUG WITH
BARED WIRES IS...
Page 4
4
KV-29X5
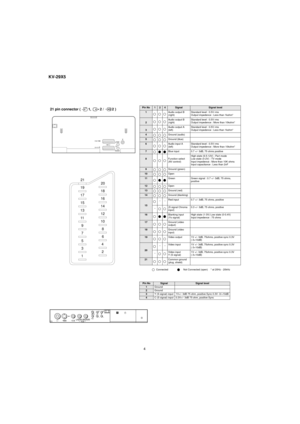
21 pin connector ( 1,  2 /  2 )
Connected Not Connected (open)    * at 20Hz - 20kHz
19
17
15
13
11
9
7
5
3
1
20
18
16
14
12
10
8
6
4
2 21
Pin NoSignalSignal level1Ground2Ground
3Y (S signal) input 1V+/- 3dB 75 ohm, positive Sync 0.3V -3/+10dB4C (S signal) input 0.3V+/- 3dB 75 ohm, positive Sync
Pin No124SignalSignal level
1Audio output B
(right)Standard level : 0.5V rms
Output impedence : Less than 1kohm*
2Audio output B
(right)Standard level : 0.5V rms
Output impedence : More than 10kohm*...
Page 5
5
KV-29X5
TABLE OF CONTENTS
CAUTION
SHORT CIRCUIT THE ANODE OF THE PICTURE TUBE AND THE
ANODE CAP TO THE METAL CHASSIS, CRT SHIELD, OR THE
CARBON PAINTED ON THE CRT, AFTER REMOVAL OF THE
ANODE CAP
WARNING !!
AN ISOLATING TRANSFORMER SHOULD BE USED DURING ANY
SERVICE WORK TO AVOID POSSIBLE SHOCK HAZARD DUE TO
LIVE CHASSIS. THE CHASSIS OF THIS RECEIVER IS DIRECTLY
CONNECTED TO THE POWER LINE.
SAFETY-RELATED COMPONENT WARNING !!
COMPONENTS IDENTIFIED BY SHADING AND MARKED ON
THE SCHEMATIC DIAGRAMS, EXPLODED...
Page 6
6
7
RM-883PROGRMENU/
Basic TV FeaturesOverview of TV ButtonsOn/Off Switch.
Programme Up or
Down Buttons.
(selects TV channels).
Volume Control Buttons.
Auto Tune
Button Video Input Button.
(selects input signals
from VCR etc.).
Overview of Remote Control ButtonsTo Mute Sound
Press to mute TV sound. Press again
to restore the sound.To Select Channels
Press to select channels.
For double-digit programme
numbers, e.g. 23,  press  -/-- first,
then the buttons 2 and 3.
To Change Screen Format
Press to view...
Page 7
7
9
Additional TV FeaturesAdjusting the PictureAlthough the picture is adjusted at the factory, you can modify it to suit your own
requirement.
1
Press the
 button on the remote control to
display the three different modes on the TV
screen.
2
Press the
 button to highlight the user mode
symbol  as shown.
3
Press the MENU button to display the menu on
the TV screen.
4
Press the blue button on the control to select the symbol on the TV screen then press the yellow
button.
5
Press the blue button to...
Page 8
8
11
Additional TV FeaturesUsing the Sleep TimerThe TV may be set to switch automatically to the standby mode after a length of time
chosen by you. You may set the time in 15 minute steps up to 4 hours.
RM-883PROGRMENU/
1
Press the MENU button on the remote control to
display the menu on the TV screen.
2
Press the blue button on the control to select the symbol on the TV screen, then press the yellow
button.
3
Press the yellow button repeatedly until the
required amount of time delay appears on the...
Page 9
9
13
1
Press the MENU  button on the remote control.
2
Press the blue button on the control to select
 on
the TV screen, then press the yellow button.
3
Press the blue
button to select
  then press the
yellow button.
4
With the cursor pointing at PROGR on the TV
screen as shown, press PROGR + or - button until
the channel you wish to rearrange appears on
screen, then press the blue
button once.
5
Press the red or yellow
button to select the new
programme number (e.g. PROGR 04) for your
selected...
Page 10
10
15
If a channel is slightly off tune, you can use this fine tune procedure to obtain a better
picture reception.
1
With the channel you wish to fine-tune on the
screen, press the MENU button on the remote
control.  The menu display appears on the TV
screen.
2
Press the blue button on the remote control to
select the
 symbol on the TV screen then press
the yellow button.
3
Press the blue button to select the
    F
 symbol on
the TV screen then press the red or yellow button
to adjust the tuning.
4...


