Panasonic DIla PROJECTOR PT-D995U Operating Instructions
Here you can view all the pages of manual Panasonic DIla PROJECTOR PT-D995U Operating Instructions. The Panasonic manuals for Projector are available online for free. You can easily download all the documents as PDF.
Page 1
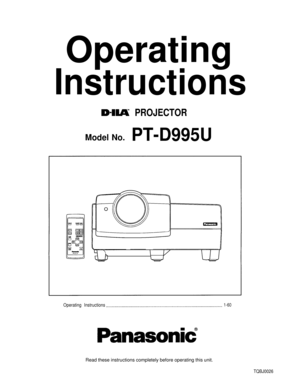
Operating
Instructions
 PROJECTOR
Model No.PT-D995U
Operating Instructions1-60
Read these instructions completely before operating this unit.
TQBJ0026
Page 2
Dear Panasonic Customer:
This instruction booklet provides all the necessary operating information that you might require. We hope it will
help you to get the most performance out of your new product, and that you will be pleased with your Panasonic
D-ILA projector.
The serial number of your product may be found on its back. You should note it in the space provided below and
retain this booklet in case service is required.
Model number: PT-D995USerial number:
2
Page 3
SAFETY PRECAUTIONS
IMPORTANT INFORMATION IMPORTANT SAFEGUARDS
WARNING :
TO PREVENT FIRE OR SHOCK HAZARDS, DO
NOT EXPOSE THIS APPLIANCE TO RAIN OR
MOISTURE.
CAUTION :
To reduce the risk of electric shock, do not remove
cover. Refer servicing to qualified service personnel.
This projector is equipped with a 3-blade grounding-
type plug to satisfy FCC rules. If you are unable to
insert the plug into the outlet, contact your electri-
cian.
FCC INFORMATION (U.S.A. only)
CAUTION: Changes or modification not...
Page 4
SAFETY PRECAUTIONS (Cont.)
This product should be operated only with the type of
power source indicated on the label. If you are not
sure of the type of power supply in your home, consult
your product dealer or local power company.
This product is equipped with a three-wire plug. This
plug will fit only into a grounded power outlet. If you
are unable to insert the plug into the outlet, contact
your electrician to install the proper outlet. Do not
defeat the safety purpose of the grounded plug....
Page 5
SAFETY PRECAUTIONS (Cont.)
*DO NOT allow any unqualified person to
install the unit.
Be sure to ask your dealer to install the unit
(eg. attaching it to the ceiling) since special technical
knowledge and skills are required for installation.
If installation is performed by an unqualified person, it
may cause personal injury or electrical shock.
5
Page 6
Contents
SAFETY PRECAUTIONS3
Accessories7
Controls and Features
8
Front Side /Top Surface / Right Side8
Left-hand side9
Bottom Surface10
Control Panel11
Connector Panel13
Remote Control Unit15
Installing Batteries16
Installing the Projector17
Precautions for installation17
Projection Distance and Screen Size18
Relationship between Projection Distances and
Projection Screen Sizes19
Effective Range and Distance of the Remote
Control unit20
Connecting to Various Devices21
Signals that Can Be Input to the...
Page 7
Accessories
The following accessories are included with this projector. Check for them; if any item is missing, please contact your
dealer.
Remote control unit (TNQE168)AAA/R03-size dry cell battery (x2)Power cord
(for checking operation)[approx. 2.5 m (8.2 ft)]
Personal computer connection cable
[approx. 2 m (6.56 ft)]
(D-sub, 3-row 15 pin)
Conversion adapter for Mac
(for Macintosh)AV connection cable
[approx. 1.5 m (4.92 ft)]Audio cable
[approx. 3 m (9.84 ft)]
(3.5 mm dia. stereo mini plug)
BNC-RCA...
Page 8
Controls and Features
Front Side /Top Surface / Right Side
Control panel
For details, refer to “Control Panel” (page 11).
Adjustable foot (for adjusting upper/lower angles)
It is adjusted to be level when shipped from the factory.
Turning to extend the foot allows adjustment up to + 7°.
Exhaust vents
Vents for cooling fans through which warm air comes out.
+7°
Do not block the exhaust vents, or heat builds up inside,
possibly causing a fire. Also, do not touch the vents, or this
could cause a...
Page 9
Controls and Features (cont.)
Left-hand side
AC IN (power input) terminal
This is the power input terminal where the supplied powercord is connected. For details, refer to page 26.
Adjustable foot (for horizontal angle adjustment)
It is set at the shortest position when shipped from the
factory Turn the foot to make the projector level. Adjustment
can be made in the range of + 1.5° and – 1.5° from the
MAIN POWER switch
This is the main power switch. When it is turned on, the
projector goes into stand-by...
Page 10
Controls and Features (cont.)
Bottom Surface
Air intake area (filter)
Air is taken in through this area to cool the light-sourcelamp. If this area is blocked or if something that obstructs
taking in or exhausting air is placed around the projector,
heat may build up inside and could cause a fire. For details,
refer to “Precautions for Installation” on page 17.
Opening for replacing the light-source lamp
For replacing the light-source lamp, refer to “Replacing the
Light-Source Lamp” on page 50.
Fixing...


![Page 7
Accessories
The following accessories are included with this projector. Check for them; if any item is missing, please contact your
dealer.
Remote control unit (TNQE168)AAA/R03-size dry cell battery (x2)Power cord
(for checking operation)[approx. 2.5 m (8.2 ft)]
Personal computer connection cable
[approx. 2 m (6.56 ft)]
(D-sub, 3-row 15 pin)
Conversion adapter for Mac
(for Macintosh)AV connection cable
[approx. 1.5 m (4.92 ft)]Audio cable
[approx. 3 m (9.84 ft)]
(3.5 mm dia. stereo mini plug)
BNC-RCA... Page 7
Accessories
The following accessories are included with this projector. Check for them; if any item is missing, please contact your
dealer.
Remote control unit (TNQE168)AAA/R03-size dry cell battery (x2)Power cord
(for checking operation)[approx. 2.5 m (8.2 ft)]
Personal computer connection cable
[approx. 2 m (6.56 ft)]
(D-sub, 3-row 15 pin)
Conversion adapter for Mac
(for Macintosh)AV connection cable
[approx. 1.5 m (4.92 ft)]Audio cable
[approx. 3 m (9.84 ft)]
(3.5 mm dia. stereo mini plug)
BNC-RCA...](http://img.usermanuals.tech/thumb/58/75922/w300__pt-d995u_en_om_d-6.png)


