Sanyo 42lm4n Instruction Manual
Here you can view all the pages of manual Sanyo 42lm4n Instruction Manual. The Sanyo manuals for Television are available online for free. You can easily download all the documents as PDF.
Page 1
CE42LM4WPN-NA
LCD Monitor
Moniteur daffichage à cristaux liquides
Monitor de LCD
Instruction Manual
Manuel dutilisation
Manual de instrucciones
EnglishPage 2 ~12
FrançaisPage    13~22
Please read this Instruction book before using your LCD monitor.  We wish you many
hours of pleasure from your new LCD monitor.
Veuillez lire attentivement ce mode d’emploi avant d’utiliser votre moniteur. Nous
espérons que votre nouveau dispositif daffichage vous procurera de nombreux instants
de bonheur.
Lea este...
Page 2
2
SAFETY SAFETY
PRECAUTIONS & SERVICING  PRECAUTIONS & SERVICING
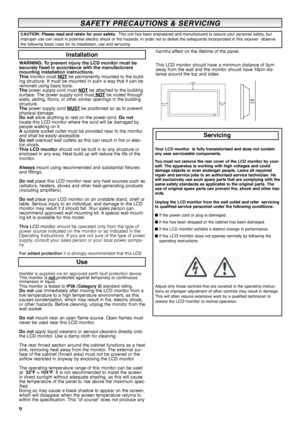
WARNING: To prevent injury the LCD monitor must be
securely fixed in accordance with the manufacturers
mounting installation instructions.
This monitor must NOT
be permanently mounted to the build-
ing structure. It must be mounted in such a way that it can be
removed using basic tools.
Thepower supply cord must NOT
be attached to the building
surface. The power supply cord must NOTbe routed through
walls, ceiling, floors, or other...
Page 3
3
COMPLIANCE & END USER LICENSE COMPLIANCE & END USER LICENSE
The product (meaning the equipment or appliance to which this
documentation relates) incorporates Software (the software
applications, utilities and modules embedded within the Product)
which is owned by Sanyo or its licensors. Before using the product,
please read the   End-User License Conditions detailed below. If you
do not agree to the terms and conditions of the End-User License,
please do not proceed to use the Product. Repack the...
Page 4
4
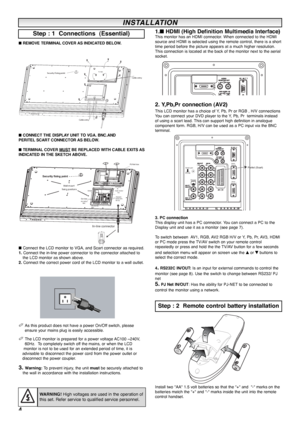
■ REMOVE TERMINAL COVER AS INDICATED BELOW.
■CONNECT THE DISPLAY UNIT TO VGA. BNC.AND
PERITEL SCART CONNECTOR AS BELOW.
■ TERMINAL COVER MUST
BE REPLACED WITH CABLE EXITS AS
INDICATED IN THE SKETCH ABOVE.
■
Connect the LCD monitor to VGA, and Scart connector as required.
1. Connect the in-line power connector to the connector attached to
the LCD monitor as shown above.
2.Connect the correct power cord of the LCD monitor to a wall outlet.
✐ As this product does not have a power On/Off switch, please...
Page 5
5
1. The LCD display will have a Standby light to show there is power.
2. Control buttons (bottom edge of cabinet)
Menu/F button:
rotate  between contrast, Brightness, color and
sharpness
Input/OK button: switch  between   AV1,  RGB, AV2, AV3,  HDMI
and PC mode.
ed buttons: adjust Menu/F options
4 button: To switch from display to standby mode (to switch off
completely disconnect the monitor from the power supply)
Many of your monitors functions are controlled through the menu
function.
During menu...
Page 6
6
Screen mode selector To select the screen mode, Auto, Natural, Full
Zoom 16:9, Title 16:9,Zoom 14:9,title 14:9 or Normal.
Refer to page 11 .
TV/AV switchTo switch from AV 1 , RGB, AV 2 , AV 3 , PC or HDMI mode
press repeatedly. Press and hold in a few seconds, an AV selection
bar appears. Select the mode you require using the
F/OK To save the setting in the menu.
MENUTo enter and exit sub menus.
Picture mode selection Press the          button repeatedly to select the following
picture modes....
Page 7
7
■Child lock
You can prevent unwanted operation on the LCD monitor via the
buttons on the bottom edge of the monitor.
1. Press the MENU button. Select Settingusing the eor dbutton.
Press the 8button to enter.
2.Select Child lock using the eor dbutton.
3.Set the Child lock to Offor Onby pressing the 7or8button.
4. Press the MENU buttonto exit.
■ AV2 setting
In setting menu, to select AV2 press the dbuttonand set to Y,Pb,Pr
or RGB, H/V depending on your external equipment.
1. Press the MENU button....
Page 8
8
The display can be controled via RS232C from a computer
Serial Interface Specification
Transfer Specification
1. Transmission Speed: initial setting value is 19200
2. Transmission speed can be changed by hotel mode.
Connection
The Designated RS-232C serial cable that is provided with the LCD
monitor must be used for a connection to a computer and LCD
monitor
Notes for communication
The monitor command is defined by one command/one line that
starts with “C” and ends with carriage return (0x0D)
There...
Page 9
9
■ Screen options
Today there are various transmission formats with different size
ratios, eg. 4:3 , 14:9, 16:9 and video formats such as letterbox.
■ Auto
It automatically switches to the optimum screen mode according to
the WSS signal provided in the receiving signal source. If the signal
does not have it, the monitor keeps current screen mode.
✐ This setting may cause the picture to change when a different
format is received eg. when an advert is received.
✐ WSS (Wide screen signaling)
Some...
Page 10
10
Common specification
Power source                  100~240V 60Hz
AV terminal
AV1: CENELEC Standard (Peritel)
Input: Composite video, RGB and audio-L/R
Output: TV-output with composite video and audio-L/R
AV2: BNC
Input: RGB, H and V / Y, Pb, Pr  audio-L/R
Output: RGB, H and V / Y, Pb, Pr
AV3: BNC
Input: Composite video
Output: Composite video
Audio M.Out: CINCH  L/R
HDMI Input : HDMI GROUP Standard
PC              Input
Serial port: RS232C: INput/Output
Net Organiser: POA-LN01 (optional)
When ordering...


