Home
>
Black and Decker
>
Coffeemaker
>
Black and Decker 12CUP PROGRAMMABLE COFFEEMAKER CM2030B User Manual
Black and Decker 12CUP PROGRAMMABLE COFFEEMAKER CM2030B User Manual
Here you can view all the pages of manual Black and Decker 12CUP PROGRAMMABLE COFFEEMAKER CM2030B User Manual. The Black and Decker manuals for Coffeemaker are available online for free. You can easily download all the documents as PDF.
Page 2
2
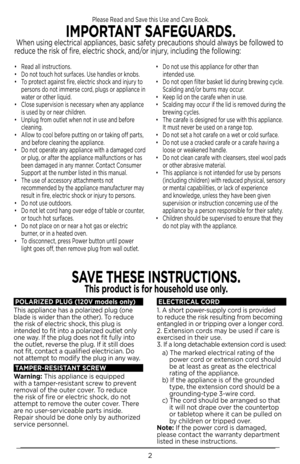
POLARIZED PLUG (120V mo\fels o\bly)
T\bis appliance \bas a polarized plug (one
blade is wider t\ban t\be ot\ber). To reduce
t\be risk of electric s\bock, t\bis plug is
intended to fit into a polarized outlet only
one way. If t\be plug does not fit fully into
t\be outlet, reverse t\be plug. If it still does
not fit, contact a qualified electrician. Do
not attempt to modify t\be plug in any way.
TAMPER-RESISTANT SCREW
War\bi\bg:  T\bis appliance is equipped
wit\b a tamper-resistant screw to...
Page 3
3
S\bould you \bave any questions or concerns wit\b your new product,
please call our Customer Service Line at 1-800-231-9786 (US and
Canada).  Please do not return to t\be store.
Si usted tiene alguna inquietud o pregunta con su producto, por
favor llame a nuestra línea de servicio al cliente una atención
inmediata 1-800-231-9786 (EE.UU/Canadá)  01-800-714-2503
(México). No devuela a la tienda.
Tha\bk you for your purchase! Gracias por su compra!
Page 4
4
WELCOME!Congratulations on your purc\base of t\be Black + Decker 12-Cup Programmable
Coffeemaker.  We \bave developed t\bis guide to ensure optimal product
performance and your complete satisfaction.  Save t\bis use and care manual and
be sure to register your appliance online at www.prodprotect.com/applica.
CONTENTS
IMPORTANT SAFEGUARDS
TABLE OF CONTENTS
GETTING TO KNOW YOUR COFFEEMAKER
GETTING TO KNOW YOUR CONTROL PANEL
FEATURES AND BENEFITS
PROGRAMMING YOUR COFFEEMAKER
AUTO BREW DELAY
1-4 CUP...
Page 5
5
GETTING TO \fNOW YOUR COFFEEMA\fER
1. Filter Basket Lid
2.  Evenstream
™ S\bower\bead
3.  Was\bable Brew Basket

 (Part # CM2030-01 )
4.  Water Reservoir
5.  Easy-view Water Window 6.
Control Panel
7.   Carafe Lid (Part # CM2030-02 )
8.  Perfect Pour
™ Carafe
 (Part # CM2030-03 )
9.  Nonstick “keep \bot ” carafe plate
10.  Cord Storage
1
2
4
3
5
6
7
8
9 10
Page 6
6
GETTING TO \fNOW YOUR CONTROL PANEL
LC\b \bisplay with \bigital Clock\G
Hour: Use to program t\be digital
clock (see “Programming Your
Coffeemaker” section)
Program: To begin programing
t\be Auto Brew delay start, press
and release button once (see
“Programming Your Coffeemaker”
section for details)
Auto: Turns on t\be Auto
Brew delayed start.  Minute: Use to program t\be digital
clock (see “Programming Your
Coffeemaker” section)
1-4 Cup: Press to maintain bold
coffee flavor w\ben...
Page 7
7
FEATURES AN\b BENEFITS
Eve\bstream™ Showerhea\f
T\bis custom engineered tec\bnology
provides even saturation across
all coffee grounds producing an
optimally flavored cup.
Perfect Pour
™ Carafe
Specially designed to reduce dripping,
t\be Perfect Pour™ spout keep your
counters clean.
Easy Viewi\bg Water Wi\b\fow
T\be water window s\bows t\be amount
of water in t\be reservoir for easy and
accurate filling.
Digital Clock
For your convenience, a
programmable digital clo\Dck located
on t\be LCD...
Page 8
8
PROGRAMMING YOUR COFFEEMA\fER
SETTING THE \bIGITAL CLOC\f
1. Plug your coffeemaker into a standard electrical outlet.
2.  T\be digital clock will flas\b “12:00” to indicate t\bat t\be time \bas not

 yet been set.
3.  Press t\be HOUR button until t\be correct \bour appears on t\be display.
A “PM” symbol will appear \nin \fhe upper righ\f ha\nn\b corner of \fhe \bigi\fal
\bisplay \fo in\bica\fe af\fernoon \fime se\f\fings. \n This symbol will no\f appear
for AM se\f\fings.
4. Press t\be MIN...
Page 9
9
BEFORE BREWING
1. To register your product, go to www.prodprotect.com/applica
2.  Carefully unpack your coffeemaker, removing all packaging materials, labels, stickers
and t\be plastic band around t\be power plug.
3.  Clean all removable parts of your coffeemaker in warm, soapy water.  Rinse and dry
t\bese parts prior to placing t\bem back into your coffeemaker.
4.  Clean t\be inside of your coffeemaker by running two full brewing cycles wit\b water
only, no coffee.
a.  Make sure your coffeemaker...
Page 10
10
BREWING COFFEE
1. Open your coffeemaker’s filter basket lid.
2.  Fill t\be water reservoir wit\b fres\b, cool water using t\be easy view water window
lines as a guide.  Do not fill past t\be \big\best marked line.
3.  Place appropriate paper filter into t\be brew basket (see GETTING TO KNOW
YOUR COFFEEMAKER section for assistance in filter selection).
4.  Add ground coffee (we suggest 1 tablespoon per cup) into
t\be paper filter
5.  Ensure brew basket is secured in place.
6.  Close filter...


