Acer Aspire 5534 Service Guide
Here you can view all the pages of manual Acer Aspire 5534 Service Guide. The Acer manuals for Notebook are available online for free. You can easily download all the documents as PDF.
Page 101
Chapter 391
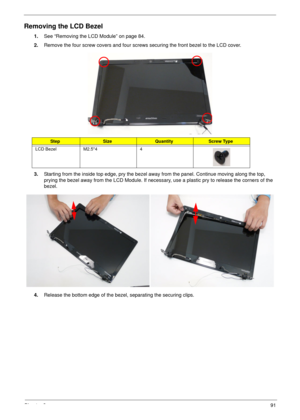
Removing the LCD Bezel
1.See “Removing the LCD Module” on page 84.
2.Remove the four screw covers and four screws securing the front bezel to the LCD cover.
3.Starting from the inside top edge, pry the bezel away from the panel. Continue moving along the top,
prying the bezel away from the LCD Module. If necessary, use a plastic pry to release the corners of the
bezel.
4.Release the bottom edge of the bezel, separating the securing clips.
StepSizeQuantityScrew Type
LCD Bezel M2.5*4 4
p
Page 102
92Chapter 3
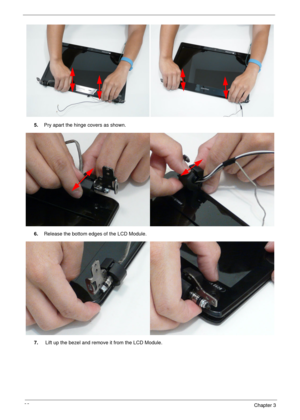
5.Pry apart the hinge covers as shown.
6.Release the bottom edges of the LCD Module.
7. Lift up the bezel and remove it from the LCD Module.
Page 104
94Chapter 3
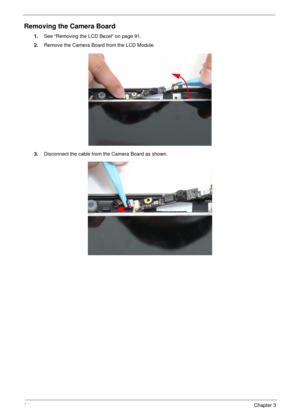
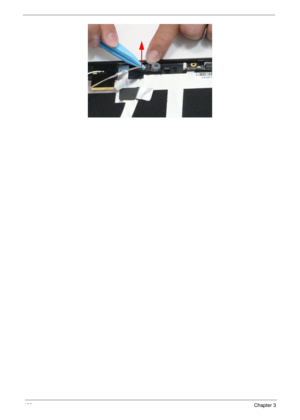
Removing the Camera Board
1.See “Removing the LCD Bezel” on page 91.
2.Remove the Camera Board from the LCD Module.
3.Disconnect the cable from the Camera Board as shown.
Page 105
Chapter 395
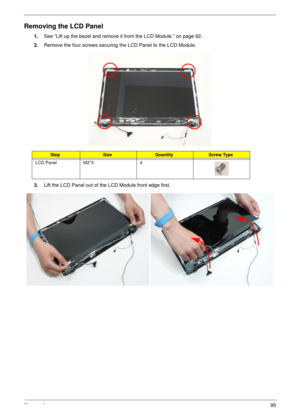
Removing the LCD Panel
1.See “Lift up the bezel and remove it from the LCD Module.” on page 92.
2.Remove the four screws securing the LCD Panel to the LCD Module.
3.Lift the LCD Panel out of the LCD Module front edge first.
StepSizeQuantityScrew Type
LCD Panel M2*3 4
Page 106
96Chapter 3
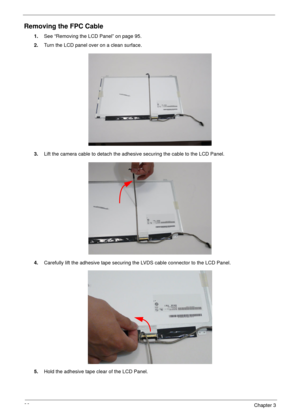
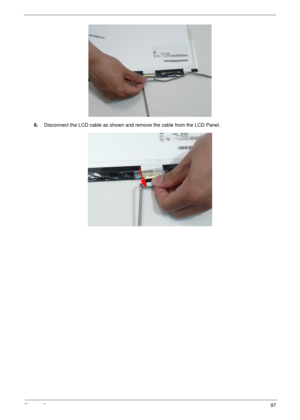
Removing the FPC Cable
1.See “Removing the LCD Panel” on page 95.
2.Turn the LCD panel over on a clean surface.
3.Lift the camera cable to detach the adhesive securing the cable to the LCD Panel.
4.Carefully lift the adhesive tape securing the LVDS cable connector to the LCD Panel.
5.Hold the adhesive tape clear of the LCD Panel.
Page 108
98Chapter 3
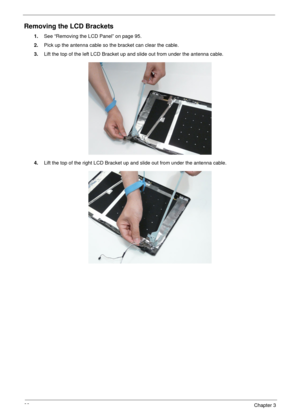
Removing the LCD Brackets
1.See “Removing the LCD Panel” on page 95.
2.Pick up the antenna cable so the bracket can clear the cable.
3.Lift the top of the left LCD Bracket up and slide out from under the antenna cable.
4.Lift the top of the right LCD Bracket up and slide out from under the antenna cable.
Page 109
Chapter 399
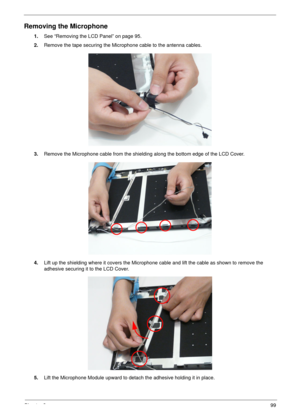
Removing the Microphone
1.See “Removing the LCD Panel” on page 95.
2.Remove the tape securing the Microphone cable to the antenna cables.
3.Remove the Microphone cable from the shielding along the bottom edge of the LCD Cover.
4.Lift up the shielding where it covers the Microphone cable and lift the cable as shown to remove the
adhesive securing it to the LCD Cover.
5.Lift the Microphone Module upward to detach the adhesive holding it in place.
